Category Archives: Technology

7 Tools To Build Your Training Materials

I get emails every day from companies promising me that they can produce wonderful, beautiful training materials for me – for a fee, of course. I suppose there are trainers out there who don’t want to bother with making their own materials, and maybe you’re one of them. I am not. Perhaps it’s the control freak in me coming out, but I prefer to do it myself.

When you’re a department of one with little resources, you learn how to put things together on your own. I’ve been creating PowerPoint presentations and course manuals for years. As more course content went online, I learned to create and edit videos. I also learned to make my own promotional materials instead of waiting for the marketing department to do it for me. Does this all take time? Yes, it does. But as you become more proficient with the tools, you can create materials quickly, efficiently, and you can keep the look and tone of the content consistent, regardless of the type.

Here are the tools that I use most often:

  • Google Slides/Google Docs: Many people use Microsoft products such as PowerPoint and Word to create presentations and documents. I, too, used these programs almost exclusively until I learned the benefits of Google Slides and Docs. First, I don’t need to remember to hit save while I’m working on a project. (How many times have you inadvertently closed something before saving? Or perhaps your computer crashed unexpectedly?) The Google programs automatically save changes to your work to your Google Drive. The other aspect of Slides and Docs that I really like is the ability to share editing responsibility with other team members. You can also share presentations and documents with others for review. You have much of the same functionality as you do in PowerPoint or Word, and if you want to, you can download your presentations and documents in those formats.
  • Canva:  I’ve written about Canva previously (I’m a fan). Not only can I create eye-catching designs for a multitude of purposes, I have access to more templates than I can count for many different purposes: presentations, social media posts, documents, website, and more. Canva makes it easy to create visuals for presentations and documents. If you upgrade to the Pro version, you get access to many more photographs and templates, as well as the ability to save your brand colors and fonts. I create all of my images for this blog/website, social media, and presentations with Canva. It’s easy to use and convenient to have everything in one place.
  • Camtasia: It’s fairly easy to make screen capture videos on a Mac or PC, but if you want to use those videos as part of online training, you’re probably going to want to edit them. You may want to zoom in to specific places on the screen, add callouts or animations, or add music or voice-over tracks. I have found Camtasia easy to work with, and it produces good results. Some of its features can be achieved with iMovie, but Camtasia does give you the ability to produce your final video in a variety of formats including those needed for some online learning platforms. To me, it’s worth the cost of the license.
  • Laptop Stand: I acquired a laptop stand several years ago as a way to help myself sit up straight while typing and viewing the screen on my laptop. Not only do I no long hunch over my laptop, I also discovered that I look at the camera at eye level when presenting webinars without sacrificing my ability to use the keypad. The bonus feature of the stand I purchased is that is it convertible. I can create a “standing desk” with it and stand up to present also. Save your back and neck and give yourself an eye-level camera angle at the same time with a laptop stand.
  • Microphone: Most laptops have built-in microphones somewhere on the side or back of the computer. Most of us will get better sound if we plug in a microphone and use it to capture our voices when presenting during webinars or making videos. This is also true if we use our smart phones to create videos for training. There are a number of different microphones you can purchase. I have both a lapel mike and a standing microphone. I also have a headset with microphone that I use for webinars if I am not on camera.
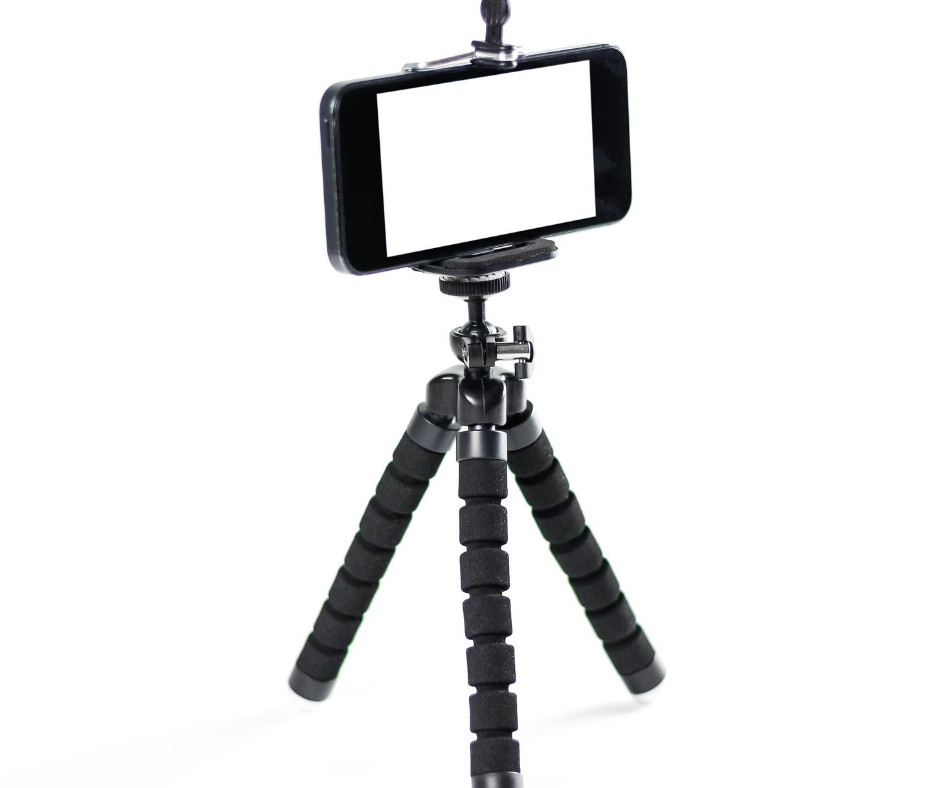
  • Smart Phone Tripod: You can shoot good videos using your smart phone, but you’re 
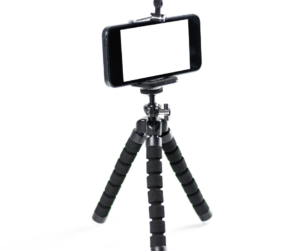
probably going to want to use a tripod to keep the image stable and lined up correctly. You can find cell phone tripod adaptors that fit on a standard tripod or you can purchase a tripod specifically for use with a smart phone. I found one that has a removable smart phone adaptor and bendable legs. I can use the adaptor with a standard tripod or use the bendable legs to place my tripod on sign posts, benches, and railings. My camera stays in place once positioned.
  • Zoom: There are plenty of video conferencing and webinar platforms out there. I mention Zoom because of three main things: The video quality is better than most platforms, it’s easy to place participants into “breakout rooms” for small group discussions or work, and it can be integrated with Facebook Live for streaming to a broader audience. Zoom Meetings gives you the ability to look at all of your participants, too. You can record webinars or meetings and repurpose the video. Whatever platform you decide to use for live, online training, be sure to learn the options and determine how you can best utilize them for engaging online sessions.

In most cases, there are online resources you can use to familiarize yourself with these tools. Learn how to use them effectively and efficiently so you can create training materials whenever you need them. What tools do you like? Leave your suggestions in the comments!

On The Frontlines of Online Training

As I sit here in Ohio under a “stay at home” order from the Department of Health, I’m reminded of the Monopoly game and the opportunity to draw the “land in jail” card: “Do not pass go. Do not collect $200. Go directly to jail.” I suspect that a lot of us feel like we just landed in jail without our $200 for passing go. Converting in-person training classes to online training occupies our brains and our work life. Organizations and businesses are scrambling to provide training for their employees to keep them engaged and moving forward when it seems that everyone is stuck in place. It’s no different in the real estate world where I work.

Although real estate services have been determined to be “essential services” in Ohio, many agents are not going on appointments, whether to list properties for sale or lease or to show prospective buyers and renters new homes. We’re living in an era of low inventory, and the current state of affairs has lead to even less properties coming on the market. (There are some people listing their homes for sale, however. People still need to move.)

There’s no better time for a real estate agent to sharpen their skills and work on their business, right? Brokerages and agents who adapt and learn during this time will be in a position to benefit from pent up demand when people reenter the market. Now is the time to ramp up learning opportunities, and remote/online learning can fill the need.

I will confess – I like presenting live, online training sessions. There is the challenge of engaging participants despite the distance. In most cases, I can’t hear or see them. How do I know that what I’m teaching is learned? This is the major difference between online and in-person training, and it scares most trainers who are accustomed to judging a student’s acquisition of the material by their immediate feedback, whether that feedback comes in the form of body language, questions asked, or passing a test. In the online classroom of webinars and meetings, we use other tools to judge students’ understanding of the material.

Trainers can still ask questions of the webinar participants to gauge their comprehension of the material. I have participants write responses in the chat box at regular intervals. I also have them respond to requests for input such as: “What topics do people look for on a real estate website?” The primary goal of this is to get the participants thinking about the kind of content they might provide to consumers on their individual websites, but this also serves as a group exercise to foster a kind of esprit de corps among the participants.

Polls give the trainer the ability to judge whether the participants have absorbed the material being taught and/or set the stage for what’s to come. I like to run polls to determine first where participants are in their understanding of the material I’m about to present. I can get reactions to a statement or have them indicate opinions. Polls can also help me determine if the material I taught “landed” with the participants. I have to always keep in mind what my purpose is when I construct the poll.

Because I can get very absorbed in presenting the material, I schedule breaks in the flow of the topic to solicit questions from the participants. Depending on the ease of use of the webinar platform you use and the size of the audience, questions can be written in a chat or questions box or microphones taken off mute for participants to speak. These are brief “check ins” for me as the presenter to make sure I keep participants’ attention and to help me assess what I need to repeat in the course of the training.

Some online training platforms such as GoToWebinar and Zoom let the organizer attach surveys to the webinar that can launch at the completion of the webinar or the next day. I ask participants to rate me as an instructor, tell me what topics they were glad we covered and which ones they would like more instruction on. I also give an opportunity for participants to contribute topics for future trainings.

I know I’m not a perfect trainer online just as I make mistakes in the classroom. I’ve learned to speak online so that participants get the message though. And right now, I’m glad I’ve honed this skill so that I can continue to train even if I can’t stand in front of a group of real estate agents personally.

Just Another Day

I have to admit it, I’ve been in a funk for a few days. It didn’t help that I spent too much time preparing for a training opportunity for which I didn’t have an agreement in place. Shame on me. I went into teaching this week with a bruised ego and a desire to prove to myself that yes, I can do it. So I was very ready to help a group of people tackle the intricacies of several technology tools for their real estate businesses. After all, I really like teaching tech!

I came home after the second of two full days of training tired and somewhat satisfied that I achieved my goals. The students picked up some tips, learned how to use the tools, and generally seemed happy with the class. Some even told me it was the best class they had attended so far (kudos to me!). I, however, have to acknowledge that I am also a bit dissatisfied, not with my performance, but with the ways we introduce people to a new profession.

It all starts with expectations. I don’t think anyone decides to spend money to fulfill the requirements for a real estate license (or any other profession that takes preparation and passing a test for entry) with the knowledge of the things it takes to be successful. That knowledge is acquired by learning on the job and the kind of training I do. Unfortunately, managers and companies that hire people to fill roles that require more training need to explain what candidates can expect to do as they start their careers. Too often, recruiters spend far too much time extolling the benefits of the work rather than explaining the work itself.

In most fields today, technology plays in important role in the day-to-day work of the business.  Most jobs utilize some form of technology tool, even if it’s only email. I see people coming into real estate who can’t distinguish between an email address and a website address. Because real estate agents often communicate with prospects and clients via email and use their websites for lead generation, this is an important distinction. I can explain the difference and I can teach someone what to type, but eventually, they have to learn and stop making the mistake. 

It’s the lack of understanding these kinds of fundamentals that perplex me. I’m not going to blame age. I know plenty of older people who are very adept at using technology for business and pleasure. I usually hear one of the students in my technology classes announce to me before we start that “I’m not good with technology.” When I hear that, I could think “oh no, here we go again,” but instead I ask what that person means by “I’m not good with technology.” The more I know, the more I can anticipate problems and try to adapt my teaching. I give the person admitting difficulties credit for understanding their weaknesses. It doesn’t absolve us from setting proper expectations coming into the profession or introductory training.

Whose responsibility is it to ensure the newcomers into our profession are able to master the tools they need to carry out their jobs? The responsibility falls on the trainers and the students alike. I find nothing wrong with telling adults that they need to practice and learn what I teach them. I don’t give out grades; their business will show how well they learn and put what they learn into practice. I am a resource person and a motivator. I help them understand how to do something, what to do in different situations, and most importantly, why it should be done. I expect the student to connect the dots.

I want students to have a good experience in training. It can be difficult for them and me if expectations are not set coming into training and students are deficient in basic skills. I will continue to be patient and help those who lag behind others in the class. At some point, though, it will be painful to struggle to catch up. I worry that the pain will outlast the benefits of practicing an exciting, new profession and cause someone to reconsider after spending time and money to get this far. That’s not fair to the newcomer.

Tips for a Memorable Webinar

Whatever you want to learn, there’s probably a webinar being held to teach you or present an update. A webinar is a cross between a live, in-person class and online learning. You watch the webinar in real time, but you’re not in the same room as the presenter. You most likely can’t talk to the presenter although you can ask questions through a chat or Q & A function on the webinar platform.

What webinars make up for in convenience for the viewer they typically loose by a lack of interactivity or feedback. This, of course, depends on the webinar presenter and how willing the presenter is to use certain techniques for a more enjoyable and memorable webinar experience. Here are some tips I have learned and utilize to create webinars that are positive learning opportunities for the participants.

  • Customize the registration: Most webinar platforms (I use Zoom, but this is also true of GoToWebinar) give you the ability to customize the registration page, if not the entire presentation. Take advantage of this to give people an idea of what you’ll present and how you’ll deliver. This could be anything from color scheme to description and even the information you request from the registrant. If you can ask questions beyond name and email address, use this to determine participants’ experience with the topic or what they hope to learn on the webinar.
  • Tell people to register even if they can’t attend: You want people to attend the live webinar, but if they have a conflict at that time, you still want to get the information to them. If you encourage people to register even if they can’t attend, you will capture their information and be able to distribute the recording after the webinar has been completed. You can stay in touch with them and invite them to a future webinar.
  • Add handouts: Just because you’re online doesn’t mean you can’t give people something to hold onto or take away from the webinar to refer to. Handouts typically can be shared during a webinar through the platform. Participants can be prompted to download the handout at the appropriate time during the webinar and asked to refer to it later as well. If you use slides during the webinar that contain a great deal of information, give participants the ability to download a PDF copy of the deck for future reference. If you’re an independent trainer, you can use the handouts as a way to give participants your contact information and a call to action.
  • Use polls: Because the webinar is a one-to-many form of delivering content, the presenter has to work to encourage interaction. Polls are a great way to get feedback or information from participants. You can gauge whether participants are paying attention or checking their email by the number of responses and how long it takes for people to register their responses. If you are encouraging adoption of a tool or process, Polls double as a way to determine whether participants are on board.
  • Have everything open and ready to go: Close any programs on your computer that you do not need, especially email if you have desktop notifications enabled. If you are using web-based tools during the webinar, be sure to close other websites and browsers to avoid a drag on bandwidth during the webinar. Have your presentation open and in slideshow mode. You can then use the webinar platform’s menu to switch between your open documents or websites during the webinar and avoid having to minimize documents or switch between browsers. This makes for a smoother viewer experience.
  • Use a headset and test your audio: You will have more control over the sound of your voice with a headset. If you tend to move your head or use your hands as you talk, a headset will follow your mouth and you won’t risk toppling a microphone on the desk. If you have a multi-directional desktop microphone and are used to using it, by all means use it. I prefer a headset because I don’t have to worry about where the microphone is during the webinar. Test the audio before you begin the broadcast to be sure the webinar platform is picking up your voice adequately. You can also ask participants at the beginning of the webinar if they can hear you and see your screen.
  • Record the webinar: Recording your webinar serves two purposes. You can review your webinar performance and use what you discover to improve on future webinar presentations. I discovered that my gaps in presentation were disturbing (too many ummms and ahhhhhs!). I worked on making my presentation more succinct and cohesive after reviewing the recording. You can usually share the recording easily through the platform with participants and absentees for their review after the live webinar. This gives them the ability to go back over the material when they most need it.
  • Have someone monitor the webinar for questions or chat: If possible, it’s nice to have an assistant checking for questions during the webinar and posing them to you as you present. Otherwise, you must keep an eye on your chat or questions boxes to address questions during the broadcast. If you don’t have someone to assist you, notify participants that you’ll address questions at certain times during the webinar. I often answer questions at the end of the webinar for the participants only. I turn off the recording and make this personalized attention a bonus of having attended the webinar live.
  • Include the recording in the follow-up e-mail: This goes with the previous point about recording the webinar. Distribute the recording through the platform. Most webinar platforms give you the ability to create a link for the recording and include the link in your follow-up email. You will want to do this instead of attaching a recording to an email (usually not possible due to the size of the recording) or posting it on YouTube or some other video sharing platform. Why? Webinar platforms are set up to register when someone views the recording after the webinar. You can see who viewed the video and when. If you’re asked to provide this kind of information, you’ll have it at your fingertips. You may decide to post the video to YouTube, for example, but wait until a few days after the webinar to encourage initial viewing through the webinar platform.
  • Use the survey function: If there is a built-in survey function in your webinar platform, use it to launch a survey upon completion of the live webinar. This is a quick way to get feedback from participants. If the webinar platform allows for integration with a survey external survey, you can make more detailed surveys to judge participants’ retention of the material presented. Use this information to tailor the next presentation on the same subject matter.
  • Get the log: Access and download the webinar log to follow up with questions you didn’t answer during the webinar and to see who attended and for how long. Use the information you get in the log to help you prepare your next webinar.
  • Edit the recording: If you are able, download the recording and edit it before posting to other platforms. You’ll have the ability to delete dead air and take out the ahhs and ummms. If you’re demonstrating a technology tool during the webinar, you can add call-outs, annotations, and pan and zoom on the screen. I like Camtasia for video editing, but there are other options you can use.
  • Practice, practice, practice: It helps to practice before your webinar. Even more important is to practice before your next webinar. Learn from your mistakes and make the next webinar one that will have participants asking for more.

Webinars are a great tool to help people in far-flung places learn the material you want or need to teach. If done well, they can be a learning experience that will motivate participants and get results.

Technology Training Options

My favorite go-to source for “how to” instructions is YouTube. When I need to learn how to do something on my computer, phone, or tablet, I open up YouTube and type “how do I .  . . ” into the search box and at least one of the results usually gives me what I want to know. I can watch a video and dissect the steps needed to perform the action necessary at the time. I’m not the only person who does this, but I do know many whom a video on YouTube does not help. They need something more than watching a video, alone. They need an instructor and a class.

This is where technology training comes into play. There are essentially two ways to deliver technology training: Demonstration or hands-on training. Demonstration classes can be either live, in-person or online, or on-demand. Hands-on training is always live, in-person training. Both have their place, and they each have pros and cons. Let’s look first at demonstration as a means to deliver tech training.

In a demonstration class, the instructor shows the participants a particular work flow or how to accomplish a task. The participants watch the instructor work through the process while the instructor explains each step. There are at least three positive aspects to delivering tech training by demonstration:

  • Low internet need: Because students are not using internet bandwidth for online tools, this type of class can be helpful when the location may be challenged to make enough wifi available for participants. An instructor can run the class using a wifi hotspot, if needed. Sometimes the best laid plans for hands-on training turn into a demonstration class when the wifi won’t support the number of devices being used in class.
  • Quicker: Because the instructor doesn’t need to start and stop to deal with individual hardware or connectivity issues, a demonstration class can be delivered faster than hands-on training. There should always be time for students’ questions as you demonstrate a tool.
  • Create excitement: When participants see what a tool can do for them when used as intended, they become excited about using it themselves. A demonstration class can cause them to try out the tool where if they had tried it themselves with or without hands-on training, they may have become frustrated and tuned out the instruction.

Hands-on training gives participants the ability to become familiar with using the tool. For some learners, “doing it” is the only way to truly learn how to use technology.
The instructor acts as a leader through a process or task; the student mirror the instructor’s actions to learn how to navigate a new tool or process. Positive aspects of hands-on training include:

  • Learning by doing: As much as we’d like to think people can learn by reading or watching instructional materials, some of our participants prefer to learn something by doing it. For these learners, hands-on instruction is their preferred method.
  • Answer questions: As learners work through a process or task, questions arise that may not have occurred to them watching a demonstration. Hands-on classes give them the ability to ask these questions and the instructor the opportunity to answer and reinforce what has already been presented.
  • Corrections: In hands-on training, instructors can address common usage mistakes on the spot. Nobody’s perfect, and often participants make mistakes that become learning opportunities in class. This can lead to less frustration when participants go back to work and begin to use technology tools on the job.
  • Individual help: If you have additional instructors available to roam the room, you’ll have people to address individual needs quickly and with fewer interruptions for the entire group. This gives participants the security to ask what they perceive to be “stupid questions.” If they feel comfortable, they may learn easier.

Both types of training and advantages and disadvantages, so when should you use demonstration or opt for hands-on training?  First, answer a few questions about the intent or purpose of this class:

  • Is this an overview to familiarize people or an opportunity to try out something?
  • Do you expect people to generally understand what to do or be able to perform tasks?
  • What is the method of delivery? (Online, in person, or recorded?) How will people be able to apply learning if they are watching a webinar, for example?
  • Will you be the only instructor available to work with the group?

When you answer these questions, you’ll find that the method of delivery becomes clear. You might also find that you plan for a two-step process where you might introduce the tool in a demonstration class or webinar and then follow up with hands-on training to take participants through the material you presented in the first class. When creating your lesson plans for either type of training, chart the process based on case studies for ease of presentation. Build in time for questions and getting side-tracked (you know it will happen). Encourage participants to get one-on-one assistance after class by scheduling the time and publishing that you (or another instructor) will be available for personalized help.

Be prepared for class with job aids. You might create printed materials with screenshots and step-by-step instructions. You could use infographics to illustrate the steps needed to work with a tool or perform an action. Perhaps you have created or have access to videos that participants can refer to after class. A web page with links to resources could be part of a follow-up email after the class.

Technology training doesn’t just “happen.” It takes time and consideration to put together the appropriate approach to the material and plan how learners will be introduced to it. Moreover, you will want to place technology training in a larger context of your training program. How will it fit in? How does learning technology tools help people do their jobs? Then, consider how you want to present the material and what will be the next steps when you determine whether to use a demonstration class or hands-on training for technology tools.

Three Ways to Promote Training Through Video

The first time I watched myself on video many years ago I really didn’t like what I saw. I was a graduate teaching assistant, and the coordinator of teaching assistants decided to have our classes video-recorded for our benefit. The intention was to show us how we handled classroom activities and worked with students. I focused on how I looked. Other teaching assistants did the same. This exercise flopped and the coordinator stopped having our classes video-recorded and went back to simply sitting in on a class to give us feedback. I was relieved.

Fast-forward a few years and now I’m attending a workshop for people who want to hone their speaking and presentation skills. Participants were required to practice in front of each other as we worked through the material. Our practice speeches were video recorded, and I received a memory card with my video-recorded speeches after the workshop. I have never looked at those files. The card is buried somewhere in a desk drawer.

Why do we not like to watch ourselves on video? My guess is that we focus entirely too much on our appearance and not enough on the message and how well we communicate it. Here’s my insight about being on camera: You are who you are, and that’s enough. When you show up in person, you may give some thought to your appearance, but you don’t obsess about it. When we reject video because we don’t like to look at ourselves on camera, we miss out on an opportunity to use the medium to communicate a message to a broad range of people in our audience.

I have learned to get over how I look on camera. Perhaps I desensitized myself by recording and watching myself many times. I began to realize that I could use video in different ways to complement in-person training and events that can broaden the reach of the messages I wished to convey to my learners. Here are three ways you, too, can use video to enhance a training program:

Event or Program Promotion. Throughout the year, we provide opportunities for our real estate agents to learn from some of the best in the business through multi-week programs or special events. I do all the usual things to promote the events or training programs: e-mails, posters, training calendar notices, word of mouth, and social media posts. Nothing has gotten the response that a video has. It may be a video of me telling people about the event or program and urging them to register and attend.
Whenever possible, I have the speaker or trainer record a video of him- or herself talking about the topic he or she will present. I share these videos via e-mail and social media. People will click on links to videos in an e-mail. They will watch on social media. It has now become a standard part of my promotion of training programs and events to make and publish a video.

Quick Tips. Sometimes you want to share some information or give people a tip they can use. I began recording “quick tip” videos about a year ago. I focus on topics that I can talk about in approximately two to three minutes. These are typically topics that reinforce topical subjects that have been discussed in the field or give agents advice.
I always give viewers information and then urge them to  take action of some kind. I record quick tips in different places. I also record update videos from conferences to give viewers some of the information I learn from attending. I have created a topic list and follow a pattern, but I generally decide to record in the moment when I feel the need to use video to continue instruction outside the classroom.

Live Video. Going live on camera and broadcasting it via social media sounds nerve-wracking, but it can be a very effective way to get people’s attention and create conversation. I have to admit, I haven’t done this as much as I would like, but I envision using live video as a way to create virtual office hours or showcase a partner through an interview. You can use live video to promote an event also. I used it to talk with a speaker prior to his appearance as a way to generate some interest. The social part of social media means that you should engage with the audience. Live video can help you do that, in real time instead of after the video is posted. The bonus?  Your video continues to live online long after the initial broadcast. Facebook live is the option that comes to mind first, but don’t forget YouTube live, too.

I use my smartphone or laptop to record the videos, and I do very little editing (usually just trimming the beginning and end). I do have a lapel microphone that I use, but sometimes I simply take my earbuds with microphone and lay it in front of me on a desk or table. The sound quality is fine (the microphone is closer to your mouth than the one in the laptop or smartphone). I have learned to accept the verbal blunders I make. I choose to appear authentically on camera instead of rehearsed and polished. I might practice once or twice before I record, but what you see is not highly produced.

My videos provide another way for me to reach my audience beyond the traditional classroom setting. I may not always like to watch myself on video, but I have found that the benefit to recording and sharing videos far outweighs any apprehension I may have had.

Seven Tips for Creating Screen Capture Video for Training

I don’t know about you, but I often search for videos to show me how to do something. It could be anything, but often it’s something technology-related. Most recently I needed to download and set up Audacity (a free audio recording software) on my Mac. I consider myself to be somewhat “techie” but this was a challenge for me to get the settings right. What did I do? I searched for a “how to” video on YouTube.

One of the biggest changes in my training world has been the increased need for technology training. There are multiple tools – online and software-based – that real estate agents use in their daily business. The successful agent needs to know how to manipulate data and use online platforms to market to potential clients, create marketing materials, and manage transactions. There are a lot of options out there, and they want to know how to use them quickly and competently.

Hands-on classroom training is good, but it doesn’t help when there’s no class or the agent can’t get to one. Online training fills the gap, but the question remains, how do you demonstrate the tools and motivate the agents to adopt technology in their businesses? Along with the “how,” the trainer needs to sell the “why.”

Classroom training has the benefit of giving the trainer face-to-face contact with the learner. When teaching tech tools, I can readily see if someone understands a concept or action and address any questions or difficulties. When using online training to accomplish the same goals, the trainer has to anticipate the questions and issues that pop up and use that knowledge when creating online training.

Screen-capture video offers me the ability to demonstrate the process for using a tool and give tips and recommendations for successful use. I record my screen while talking, then edit the video to add features that help deepen the viewer’s understanding of the tool.

Here are seven things I’ve learned when making screen capture videos for training purposes:

  • Longer is not better! Most people have short attention spans and are unable to digest large quantities of directions at once. In my experience, learners receive and comprehend videos in the two to four minute range best. Remember, I want them to be able to duplicate the processes learned, not just watch a video.
  • Plan your edits in advance. When considering the process you’re recording, think about which steps or areas of the screen need enhancement or callouts. Most editing software (I use Camtasia) will let you zoom and pan on areas of the screen and add callouts like arrows and circles. Plan what parts of the screen need attention and when so that your editing will be a smooth process.
  • Use intro and exit slides for clarification. I learned that it makes for easier viewing to have an introductory slide/picture that gives the topic of the video. Exit images include a recap of the instructions covered in the video or tips for success. I can choose to talk over those slides, if I wish, but typically I do not.
  • Check your sound quality. When I first began to record screen-capture videos, I used the earbuds that came with my smartphone to record the audio portion. This was a cheap solution, but not the best. If I moved my head, the microphone didn’t necessarily follow my mouth. I invested in a decent headset with an adjustable microphone. No matter how I move, the microphone stays with me. I also recommend recording some test videos to check the sound levels and adjusting accordingly.
  • Know what to say when. This sounds self-evident, but you will quickly derail your video if you’re not sure of the process you’re trying to instruct or you get off track. I used to script my videos, but now I write notes and practice before recording. I make sure I can succinctly move from one action to the next while I describe the process. Practice helps!
  • Record in one take. You will not be perfect in your delivery. You will forget a word or stumble over a phrase. The internet will slow down as you’re trying to get something to process on screen. Take your time and edit out the mistakes or gaps. You can record snippets of the entire process and create the complete video out of the pieces, if you want. I know that I will edit the video to add features, so cutting “umms” and “ahhhs” is part of my editing process. I have learned to pause, then start a phrase over if something happens (like forgetting a word). As you listen to yourself in the editing process, you’ll discover what your verbal “tics” are. I tend to say “so” far too much. I’ve learned to lessen the frequency of certain repetitive words when I record now.
  • Make a plan. Many of the online courses I create consist of multiple videos. I make a plan to determine which videos I need to record and in which order they will appear in the course. I don’t need to record them in the same order, but it is helpful in a some cases to progress through aspects of the tool I am featuring in the course in my video recording. This may also seem self-evident that you need to plan out your course elements, but it’s helpful to consider when sitting down to record multiple videos at once.
  • Captions. I have not yet used captions for my videos; however, I am going to begin to do this. Why? Captions enable viewing on social media (such as YouTube or Facebook) without the sound. It also gives hearing-impaired people access to your videos. Some platforms such as YouTube will automatically create a transcription of the audio portion of your video. Camtasia offers a “speech to text” option to create the transcription. With any automatic transcription service, you’ll need to check the accuracy of the text as compared to the video. The next step is to use your video editing tool to add the captions to the video. I’m going to test this process, then decide whether I want to pay someone to create captions for my videos.

I distilled these tips from my experience creating screen-capture video. With some practice and attention, you can create your own videos and edit them to your specifications. The bonus? You get to tell your learners which features are important for their businesses or positions and how to best use the tool.

There’s something new in our fields almost every day that a video can help explain or demonstrate. That means I need to get back to my computer and get back to recording!

How to Use a Video Challenge in Training

What’s the first thing you think when you see yourself on video? (Be honest!) It’s generally not a positive experience and that’s why so many professionals shirk from using video as a way to promote themselves and their businesses. It’s expensive to hire a video production company to make you look good, so why bother?

Video can be a great way to get the word out about your business. It’s also showing you as a human being, someone who’s approachable and relatable. Most social media platforms favor video, too, so it can help boost your visibility online. Who wouldn’t want to have more visibility for their business?

The problems arise when you try to figure out how to use video without hiring the production company or buying the fancy equipment. Most of us have the tools in our pockets, yet we fail to understand how we can use them to our advantage. I was in that situation last year. I wanted to learn how to create videos that looked decent but didn’t cost much but my time and effort (no money in the budget for the production company!). I learned about Niamh Arthur’s 30 day video challenge and decided to take the plunge. I knew I needed to learn the techniques before I could adapt and teach them for my audience of real estate agents.

Once I learned how to use my smartphone and laptop to create some decent videos, I started creating “quick tips” for consumption by agents and anyone else interested in learning the practice of real estate sales. These videos serve to teach aspects of a real estate business and to demonstrate that it’s not so difficult to make great-looking and -sounding videos with minimal equipment and skill.

How can you get independent contractors (in this case, real estate agents) to use video for their businesses so they capture more prospects and clients? I decided to use a video challenge to teach the techniques and get them used to creating video.

My first task was to decide how long this challenge would be. Considering the sometimes short attention spans of my audience and the demands on their time that a real estate business makes, I decided make the challenge three weeks long and have the agents record 15 videos. This allows for “catch up” time on the weekends when there would be no videos to record if the participant had recorded the weekday videos. There was no requirement to record each day. Instead, participants could record as many videos on a given day as they needed to to catch up to the group if they were behind.

Next, I had to decide the topics for each of the videos. Most days, the participants had to record a video that was relevant to their businesses. However, it is important to have several topics that are more general (tell about yourself, what’s one thing you can’t live without for your business, etc.). These topics are designed to get participants talking on camera instead of worrying about saying the right thing to a potential client. I devised a topic list and a schedule to organize the challenge in a meaningful way.

With the topics developed, it was time to record the prompt videos. Each day, participants would get an e-mail with a link to the video for the day. These videos were posted as “unlisted” on my YouTube channel so that only those with the link would be able to view them. I considered how to record the videos and decided to “batch” record them. In other words, I prepared my topics, made notes, set up my equipment in an office, and recorded all 15 prompt videos, three “weekend edition” videos, and introductory and conclusion videos in one day. Two of the videos required additional screen-capture video and editing because they taught the fine points of posting video on YouTube and Facebook, and creating playlists. One video was shot outdoors to demonstrate how moving your location can spike interest. Because I recorded them in one day, I changed tops and accessories to give the illusion that they were recorded on different days.

With recording out of the way, the next steps focussed on completing any editing, posting the videos to a YouTube “unlisted” playlist, and creating the e-mail campaign in my CRM to have the instructional e-mails delivered on schedule. Participants were given instructions in each e-mail about how to post their videos and to watch other participants’ videos and give feedback. I created a closed Facebook group where participants could post the YouTube links and watch each others’ videos.

One important step not to forget is to promote the challenge to potential participants. I used video here, too. I created a video to explain what the challenge was and how it could help an agent’s business to learn how to create videos. I shared that video through e-mail, company newsletter, and my Facebook business page. Agents were prompted to pre-register for the challenge, but they could join at any time as long as they understood they would have to record several videos to catch up with the rest of the group.

It’s important to remain flexible with people who are participating in this type of activity for their own benefit. There were no assessments and no consequences for not completing the challenge. I did have a benefit to completing the challenge to help convince participants to complete and post all 15 videos. I held a live webinar that was open only to those who completed the challenge by a certain date. During the webinar, I taught additional techniques and gave away prizes such as smartphone tripods and clip-on microphones. The webinar was recorded and made available to the participants who couldn’t attend it live.

Once you have created the challenge prompt videos, campaign e-mails, and Facebook group, you can present the challenge multiple times to different groups. The key is promoting the challenge to attract the most participants possible. In very large challenges, the participants are placed in smaller groups to facilitate feedback and camaraderie. My group was small, so all were able to watch each other’s videos and provide feedback.

I gave positive feedback as often as possible and corrected glaring mistakes as gently as I could. Most participants got the hang of recording their videos within a few days and went on to create useful videos in the course of the challenge. I specifically designed several of the prompts to be topics they could use for their businesses immediately, if they chose to do so.

A video challenge can give learners a hands-on approach to learning how to create and use video for their businesses. Success is measured not by the quality of each video, but by the progression of the acquisition of skills and the completion of the challenge.

Three Ways to Use Video in Training

Everybody seems to be on the video bandwagon these days – or are they? While it is generally accepted that video is a great marketing tool, training professionals are reluctant to use self-produced video in informal or formal training situations. Maybe they think they aren’t photogenic or don’t really know if their video will work they way they want it to. Whatever the excuse, there are just as many reasons to use video for training – and not just in your LMS.

I started using screen-capture video several years ago to give real estate agents demonstrations of how to use various technology tools as a way to bridge the gap between in-person training and live webinars. Since then, my video repertoire has increased, and I use video in three distinct ways to enhance learning.

For technology training, screen-capture video is very helpful. I use Camtasia to record and produce my videos; however, there are other programs that you can use. If you have a Mac, you have built-in screen-capture video recording capability and iMovie to edit the video. Length of video depends, but generally I try to keep these to less than five minutes. It’s difficult to absorb complex actions in longer videos and be able to duplicate those actions if the video runs too long. I produce the video and add zoom in, callouts, and other animations to draw attention to important functions.

When I first started producing screen-capture videos, I scripted everything and tried to record them in one take. Sometimes I was successful, but often I had to rerecord multiple times to get it “just right.” I take a different approach now. Since I’m going to edit the video anyway, I simply pause, count out loud, and pick up where I need to. This makes it easy for me to cut the mistakes and find the correct spot to continue.

About a year and a half ago, I decided I needed to learn to make videos of myself talking. At first, I was apprehensive (who would want to look at me talking?), but I realized that this could be an effective way to communicate material to a wider audience than those who show up for live training. I happened to stumble upon a video challenge run by Niamh Arthur of Light It Up Marketing. I took the 30-day challenge, created 22 videos in 30 days and learned how to create my own videos using the equipment I already had: a smartphone, computer, and me.

Since that initial challenge (I did it again in the spring of 2018), I have acquired a smartphone tripod and another microphone, but essentially the process has remained the same. I created a list of topics that I wanted to present. I choose a topic from the list and give it some thought. I find a place to record. This could be somewhere outdoors or indoors, but always with sufficient sunlight (I don’t use artificial light except when absolutely necessary). I set up my smartphone and record. Most of my videos are done in one take, sometimes two. I worry less about messing up the words than being authentic and speaking to my audience. The only editing I do is to trim the beginning and the end of the video to cut any unwanted motion.

What kinds of topics do I record in these videos? I focus on anything that might relate to real estate agents’ business: sales skills such as prospecting, presentations, business planning, working with buyers and sellers, and time management. These videos are typically two to three minutes in length. I labeled them “Real Estate Quick Tips” and share them via social media and e-mail.

The third type of video I use is that which is recorded in live, in-person training sessions. When learning skills such as negotiations, contract presentation, and client interviews, it’s often helpful for a salesperson to see what he/she looks like and says. We do role play in classes, and to add another layer to role playing, I have agents form groups of three: one person plays the agent, one person plays the client, and the third person records the role play on their smartphone or tablet.

The recording is shared immediately as the third person gives feedback to the agent. This may be difficult for the agent to watch, but very instructive. There is no judgement – all participants must take their turn and be recorded and receive feedback. The videos are shared with the participants and it is up to them to keep or discard them. I credit David Knox for this technique which he labeled “iPractice.”

One thing to keep in mind is that video assets, when shared on social media, can live on long after the initial training has occurred. I include a call to action on my quick tip videos to prompt people to subscribe to my YouTube channel and give them the ability to sign up for the playlist at the end of the video. I also share videos on my Facebook Business page for increased visibility. The screen-capture videos are also posted to our company intranet site for easy reference, and I have used videos to create online classes for agents to take on demand. One video can easily be used in three places to lengthen the life of the training. (Videos recorded in training for the purpose of feedback are never shared online and serve only to help participants develop their skills.)

Video can be a great way to teach adult learners various skills needed for them to do their jobs well. It can also be a great way to promote the efficiency and efficacy of the training department. If you haven’t tried creating video yourself, what’s holding you back? If you have created videos for training purposes, how do you use them?

Monday, Monday

Mondays toward the end of a month mean teaching tech training classes. I have the pleasure of teaching agents new to our brokerage how to use the tools we provide for their real estate business.

This seems like a noble cause, and honestly, I do enjoy being able to help the agents learn what the tools can do for them. There are days, though that try my patience. Today was one of those days.

Five minutes before class, there was only one person in the room besides me. There were eight names on the list of registrations. My first thought was that perhaps they decided to skip class to see the solar eclipse. Over the next five minutes, people wandered into the room. One man showed up without a laptop. This class is hands-on training, and agents are prompted upon registration and reminded the day before class to bring a laptop with them. He asked me if he should have a computer. I said yes. I know from experience that those who come without a computer end up staring into space and not getting much out of the class. He departed to retrieve his laptop and arrived at class an hour late. He struggled to catch up with the other participants.

Note to self: Be more explicit with the reminders about bringing a laptop to class.

Sometimes participants are worried that I won’t cover something that they have a burning desire to know about. I always start the class by telling them what the agenda is and how we will accomplish each item on it. That doesn’t stop them from asking me about things I will cover in the minutes to come. This happened repeatedly today. Despite my best efforts to reassure them, I continued to get “how do I” questions that I would cover in short order. Two things about this: It causes me to constantly say “We’ll get to that” (which sounds like a cop-out) and it heightens the level of frustration the agents feel. Neither is a good option.

Note: Prepare an outline and give it to the agents to follow through the class.

Complicated topics require extra preparation and targeted delivery in class. I try to break down the process and explain carefully what the steps are as I demonstrate them. I repeat myself and the demonstration often, and prompt agents to work along with me through the process. Most of the participants stay on track and can follow. A few are unable to keep up and all of a sudden I get the dreaded “where are we?” question. I then must stop the class and assist the person who has gotten off track. It can be as simple as helping them with a click or two to get to where they need to be. Sometimes it requires troubleshooting a range of issues from browser type to restarting the computer to Install updates that the person inadvertently clicked on. It takes time to get back to where we were. It’s frustrating for the participants who work diligently to keep up. It’s frustrating for me to have to stop and start multiple times because some participants are somehow unable to follow directions or pay attention for a period of time.

Note: Break down the process into shorter, more digestible chunks and check in with all participants on a regular basis to make sure they are able to follow along.

When you get to the end of a long day of training, both the participants and trainer are tired and ready for a break. I try to summarize the actions I covered and what they should have learned over the course of the day. It never fails that someone claims he/she doesn’t know what to do or how to do it because they “just don’t get it.” My attempts to calm the frustrations and explain that all participants will want to practice with various tools can fall flat. Such was the case with one man today. He just couldn’t understand the process of setting up a signing session for his client to sign documents electronically. What finally came up was a general angst about not knowing which documents are needed for different situations. Although I could answer his questions, he was convinced there was nothing that could help him (there is/are–he just decided that there wasn’t). I fought hard to not lose my temper or get sarcastic with the agent. My tolerance for this kind of response at the end of the day is nil.

Note: Devise a way to communicate expectations for agents so that they understand the scope of what is covered in the class and where to go for additional help.

Tomorrow is another day of tech training. If I had my way, I would break down these two full days into several shorter sessions. The reality is that everyone (managers and agents alike) want to get through the introductory training as quickly as possible. Ideally, agents would go online for much of the compliance and basic tools training before coming to a class. In class we would focus on application of the tools in selected situations. I have moved the syllabus of this sequence to a more situation-based approach. The next step is to create the online modules to take the place of some in-class time.

Note: Create more online modules and rework the class outline to incorporate them into the sequence. Schedule less time in class. Communicate the rationale for this mode of delivery and get agents and managers to buy into the changes.

A good night’s sleep does wonders for my ability to handle even the most frustrating situations in tech training. Sometimes that’s all I can do to prepare myself for the next day’s adventures!